
Walking into a conference room where the video call just freezes, the audio echoes, or nobody can figure out how to join the meeting is a nightmare for any IT manager. You don't have time for trial and error when executives are waiting to close a deal. A proper conference room VoIP setup isn't just about plugging in a camera; it’s a structured system of hardware, software, and network configuration that works together seamlessly.
In 2026, the market for this technology has matured significantly. We’re moving away from clunky, proprietary boxes toward flexible, cloud-connected ecosystems. Whether you’re outfitting a small huddle space for four people or a massive boardroom for twenty, understanding the specific equipment tiers and configuration steps is critical to avoiding costly mistakes. This guide breaks down exactly what you need, how much it costs, and how to configure it so your team can focus on the meeting, not the tech.
Key Takeaways
- Budget Realistically: Hardware and installation dominate costs, not software licenses. Expect $2,500-$6,000 for small rooms and up to $40,000+ for large boardrooms.
- Choose Your Platform First: Decide between Zoom Rooms and Microsoft Teams Rooms before buying hardware, as certification requirements differ.
- Audio is King: Invest heavily in microphone arrays (like Shure or Poly) rather than cutting corners here, as poor audio causes more frustration than low-resolution video.
- Wired is Essential: Always use wired Ethernet for room endpoints to ensure stability; Wi-Fi is too unreliable for mission-critical calls.
- Standardize Where Possible: Using similar hardware across multiple rooms simplifies maintenance and reduces training time for staff.
Understanding the Core Components
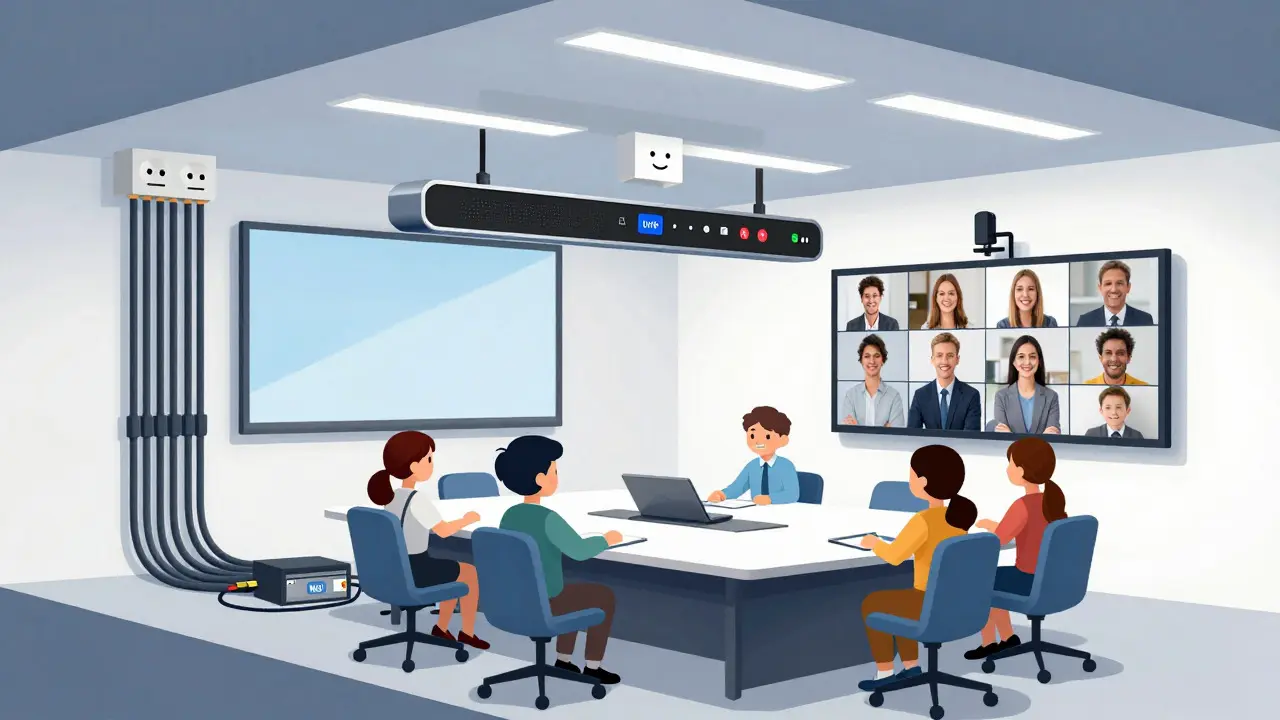
A modern conference room VoIP system consists of five distinct layers. If one layer fails, the whole experience suffers. Let’s break them down so you know exactly what you’re buying.
1. The Endpoint (The Brain)
This is the device that processes the audio and video. In 2026, most organizations choose between an all-in-one video bar (like the Logitech Rally Bar or Yealink MeetingBar) or a modular kit with separate cameras, speakers, and DSPs. Video bars are easier to install but less scalable. Modular kits offer better sound quality in large spaces but require more technical setup.
2. The Compute Appliance
Unless you’re using a dedicated appliance like a Neat Bar or Logitech Rally, you’ll need a PC running the room software. For Zoom Rooms, this is often a NUC (Next Unit of Computing). For Teams Rooms, it could be a Surface Hub or a standard Windows PC. This device runs the operating system and the collaboration app.
3. Display and Control
You need a screen to see remote participants. More importantly, you need a touch controller (like a Logitech Tap or Yealink Touch Panel) for "one-touch join." Without this, users have to fumble with laptops or phones to start a meeting, which defeats the purpose of having a dedicated room system.
4. Audio Infrastructure
This includes microphones and speakers. Small rooms might get by with the built-in mics on a video bar. Large rooms need ceiling-mounted microphone arrays (such as Shure MXA920) to capture voices evenly without feedback.
5. Network Connectivity
Every component needs a stable IP connection. This means Ethernet cabling, potentially Power-over-Ethernet (PoE) for cameras and controllers, and proper VLAN segmentation to keep AV traffic separate from general office data.
Equipment Selection by Room Size
Not every room needs the same gear. Over-specifying wastes money; under-specifying creates bad meetings. Here is how to match equipment to your space.
| Room Type | Capacity | Recommended Endpoint | Audio Strategy | Est. Hardware Cost |
|---|---|---|---|---|
| Huddle Room | 2-6 People | All-in-one Video Bar (e.g., Logitech Rally Bar Mini, Yealink A10) | Built-in beamforming mics | $1,500 - $3,000 |
| Standard Conference | 6-12 People | Video Bar + Touch Controller (e.g., Logitech Rally Bar, Neat Bar) | Built-in or single external mic array | $4,000 - $8,000 |
| Boardroom | 12-20+ People | Modular Kit (Separate Camera, DSP, Ceiling Mics) | Multiple Shure/Poly ceiling arrays | $10,000 - $40,000+ |
For huddle rooms, simplicity is key. An all-in-one bar saves installation time. However, if you have a long rectangular table, check the field of view. A 90-degree camera might miss people at the far end. In these cases, a slightly wider lens or a secondary camera might be worth the extra cost.
For boardrooms, don’t rely solely on a video bar. The distance between the camera and the farthest participant is too great for clear facial recognition. Instead, use a high-quality PTZ (Pan-Tilt-Zoom) camera paired with a digital signal processor (DSP) that handles echo cancellation and noise reduction. Pair this with ceiling microphones that create a "zone" of audio pickup, ensuring everyone is heard equally regardless of where they sit.
Software Platforms: Zoom Rooms vs. Microsoft Teams Rooms
Your choice of software dictates your hardware compatibility. As of 2026, the two dominant platforms are Zoom Rooms and Microsoft Teams Rooms.
Zoom Rooms is a cloud-based collaboration platform that allows users to join meetings via certified hardware devices. It offers a wide range of certified hardware partners including Logitech, Poly, Neat, and Yealink. The licensing model is straightforward: approximately $49 per room per month on annual billing. The advantage here is flexibility; many hardware vendors certify their devices for Zoom, giving you more options for budget-conscious deployments.
Microsoft Teams Rooms is a room system solution deeply integrated with the Microsoft 365 ecosystem. If your organization lives in Outlook and Teams, this is the natural choice. Licensing starts around $40 per room per month for the Pro tier, which is required for advanced management features if you have more than 25 rooms. The integration with calendar invites is seamless, allowing users to join directly from their Outlook notification on the room controller.
Which should you pick? Look at your existing infrastructure. If 80% of your clients use Zoom, go with Zoom Rooms. If you’re a heavy Microsoft shop, Teams Rooms will provide a smoother user experience due to native identity integration. Mixing both is possible but adds complexity to your support model.
Step-by-Step Configuration Process
Buying the hardware is only half the battle. Proper configuration ensures reliability. Here is the workflow we recommend for IT teams.
- Network Preparation: Before installing anything, ensure you have a dedicated VLAN for AV devices. This isolates multicast traffic (used for video) from regular web browsing. Assign static IPs or reserve DHCP addresses for each room endpoint to prevent address conflicts.
- Physical Installation: Mount displays and cameras first. Use cable management channels to hide wires. Ensure PoE injectors or switches are accessible for future troubleshooting. Connect the compute appliance to the display via HDMI and to the network via Ethernet.
- Software Provisioning: Boot up the compute appliance. Join it to your domain (if applicable) or set up local admin accounts. Install the room software (Zoom Rooms or Teams Rooms). Apply the license key during initial setup.
- Hardware Pairing: Connect the video bar or modular components. For USB devices, plug them into the PC. For networked devices (like some Yealink or Poly systems), connect them to the network and let the room software discover them automatically. Pair the touch controller via Bluetooth or USB.
- Audio Calibration: This is the most skipped step. Run the built-in calibration tools in the room software. Adjust microphone sensitivity to avoid picking up HVAC noise. Test speaker volume levels to ensure they fill the room without causing feedback loops.
- User Testing: Invite a few colleagues to test the room. Have them join from different locations (mobile, desktop, another room) to verify audio clarity and video framing. Check that the "one-touch join" button works instantly.
Cost Breakdown and Budgeting Tips
Many organizations underestimate the total cost of ownership (TCO). While the software license is visible, the hidden costs are significant.
Hardware Costs: As noted earlier, expect $1,500-$3,000 for basic setups and up to $40,000 for complex boardrooms. Don’t forget accessories: HDMI cables, mounts, power strips, and spare remotes add up quickly.
Installation Labor: Professional AV integrators charge between $100-$150 per hour. A simple huddle room setup might take 4-6 hours ($400-$900). A boardroom with ceiling mics and custom wiring can take 20+ hours ($2,000-$3,000+).
Licensing: Zoom Rooms is ~$49/month/room. Teams Rooms Pro is ~$40/month/room. Multiply this by the number of rooms and years. For 10 rooms over 3 years, that’s roughly $17,000-$18,000 in recurring fees.
Pro Tip: Consider Hardware-as-a-Service (HaaS) models. Vendors like Zoom and its partners now offer subscription-based hardware leases for $100-$150 per month per device. This converts capital expenditure (CapEx) into operational expenditure (OpEx), making budget approval easier and simplifying refresh cycles when technology becomes outdated.

Common Pitfalls and How to Avoid Them
Even with the right gear, things can go wrong. Here are the most common issues we see in the field.
- Wi-Fi Dependency: Never rely on Wi-Fi for primary conference room endpoints. Packet loss causes video freezing. Always use wired Ethernet. If you must use Wi-Fi, use enterprise-grade access points with dedicated SSIDs for AV.
- Echo Cancellation Failures: If remote participants hear an echo, it’s usually because the microphone is picking up the speaker output. Move the microphone further from the speaker or adjust the DSP settings to increase echo cancellation depth.
- Firmware Mismatches: Keep all devices updated, but do it during off-hours. Sometimes, updating the camera firmware requires rebooting the entire system. Schedule maintenance windows accordingly.
- Poor Lighting: Even the best AI framing algorithm struggles in dark rooms or with strong backlighting. Ensure your conference room has consistent, ambient lighting. Avoid placing windows directly behind the main seating area.
- Lack of Documentation: Create a simple "How to Use" sign for each room. Include QR codes linking to video tutorials for joining meetings and sharing screens. This reduces help desk tickets by up to 30%.
Future-Proofing Your Investment
Technology changes fast. To protect your investment, prioritize open standards. Choose hardware that supports SIP (Session Initiation Protocol) in addition to proprietary cloud apps. This ensures that if you switch from Zoom to Teams, or even to a self-hosted PBX in the future, your expensive cameras and microphones won’t become e-waste.
Also, monitor the rise of AI-enhanced features. Features like automatic speaker tracking, background noise suppression, and real-time transcription are becoming standard. When comparing vendors, ask about their roadmap for AI capabilities. A device that is excellent today might feel dated in two years if it lacks these intelligent features.
Frequently Asked Questions
Do I need a dedicated PC for my conference room VoIP setup?
Not always. Many modern video bars like the Logitech Rally or Neat Bar include a built-in computer or work with a lightweight appliance. However, for maximum flexibility and compatibility with third-party apps, a dedicated mini-PC (NUC) running Windows or Linux is often recommended. It allows you to run the room software alongside other utilities if needed.
What is the difference between Zoom Rooms and Microsoft Teams Rooms?
The core difference is ecosystem integration. Zoom Rooms integrates with the Zoom cloud service, while Teams Rooms integrates with Microsoft 365. Functionally, they both offer one-touch join, calendar integration, and content sharing. Choose based on which platform your employees and clients use most frequently. Both require certified hardware to function optimally.
How many microphones do I need for a large boardroom?
A good rule of thumb is one ceiling microphone array per 900 square feet (approximately 83 square meters). For example, a 30x30 foot room would typically require one Shure MXA920 array. Larger or acoustically challenging rooms may need multiple arrays connected via Dante networking to a central DSP for optimal coverage.
Can I use my existing TV as a display for a VoIP conference room?
Yes, but with caveats. The TV must have HDMI inputs and ideally support HDCP 2.2 for 4K content. It also needs to be controllable via IR or HDMI-CEC so the room system can turn it on/off automatically. Dedicated commercial displays are preferred for durability and lower standby power consumption, but consumer TVs work fine for smaller budgets.
Is Wi-Fi good enough for conference room video calls?
Generally, no. Wired Ethernet provides a more stable connection with lower latency and packet loss, which is critical for smooth video and audio. Wi-Fi can suffer from interference, especially in dense office environments. If you must use Wi-Fi, ensure you have enterprise-grade access points and a dedicated SSID for AV traffic to minimize congestion.
How long does it take to install a conference room VoIP system?
A simple huddle room with an all-in-one bar can be installed and configured in 4-6 hours. A standard conference room with a video bar, controller, and display takes 8-12 hours. A complex boardroom with modular components, ceiling microphones, and custom wiring can take 2-3 days depending on the complexity of the network and physical installation.